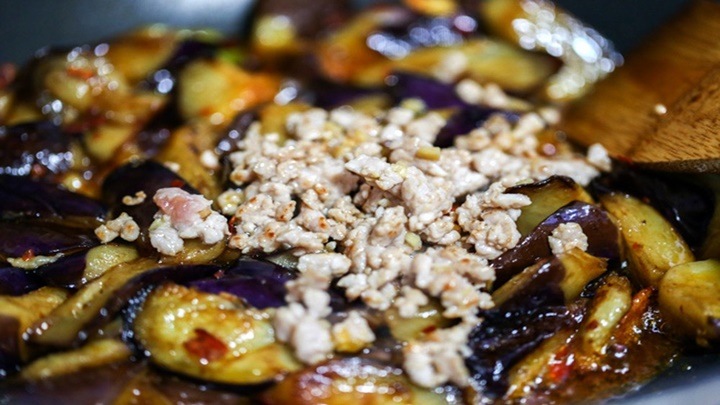
Chinese Style Eggplants with Ground Pork

INGREDIENTS

  • 2 Medium eggplants
  • salt
  • 1/4 cup minced pork
  • 1 tsp. minced ginger
  • 1/2 tbsp. Chinese cooking wine
  • 3 tbsp. cooking oil 
  • 2 garlic cloves, sliced
  • 1 thumb ginger , sliced
  • 2 green onions, white half and green half divided
  • 1 tbsp. light soy sauce
  • 1/8 tsp. sugar
  • 1/2 tsp. sesame oil

Instructions

  1. Remove the ends of Asian eggplants and then cut into small cubes (for the best flavor, try to cut each cubes with some skin). Transfer them into a large pot filled with water, add pinch of salt and soak for 10 minutes. Add a weight if necessary to make sure the eggplants is well soaked. Set aside to drain completely.
  2. Marinate minced pork with minced ginger, a small pinch of salt and Chinese cooking wine. Set aside.
  3. Heat 2 tablespoons of oil in wok and fry the eggplants for 6-9 minutes until the eggplants become soft and withered. Transfer eggplants out and leave the oil in.
  4. Add marinated pork in to stir-fry until the color changes into white. Transfer out.
  5. Re-heat around 1 tablespoon of cooking oil in wok and fry green onion white parts, garlic, ginger, and doubanjiang until aroma. Return the eggplants along with fried minced pork, soy sauce, sugar and sesame oil. Mix well.
  6. Garnish chopped green onion (green parts) and serve with steamed rice.

Shallots

Shallot

Shallot

Pronounce it: shal-lot

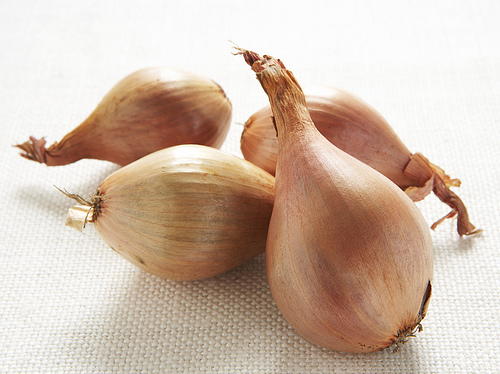
Related to the onion (as opposed to being a younger version of it), shallots grow in clusters at the leaf base. Most varieties are smaller than onions, have finer layers and contain less water.

The flavour of a shallot is much milder and sweeter than that of an onion, so if a recipe specifies shallots, substituting onions won’t give the same results. Their lower water content means they need to be cooked more gently than onions.

Choose the best

Look for firm shallots, with no soft spots, damp or mouldy patches. Brown (also known as English or Dutch) shallots are the most commonly available. Small, with a light brown skin, they have a mild flavour, and sometimes have more than one bulb inside.

Banana shallots are the largest variety and are named for their size. They have a smooth, tan-coloured skin and are slightly milder than other types. As they’re larger, they’re swifter to prepare than the same volume of smaller shallots.

Pink shallots have a pink skin and a crisp texture and their flavour is pungent, but not harsh.

Prepare it

Trim off the top and peel (standing the shallots in boiling water for a minute or two after trimming makes peeling easier). Then slice finely or chop. If you’re using banana shallots, their longer size means you can use the same method to chop as you’d use for onions, as follows. Cut in half from top to bottom. Put the cut side down and make a number of horizontal cuts towards, but not quite reaching, the root. Then make as many vertical cuts through the shallot, again not quite reaching the root. Holding the shallot very firmly and with the knife blade at right angles to the first set of cuts that you made, slice down vertically – the shallot will fall away in small pieces as you go. Continue cutting until you reach the root, which you can now discard.

Store it

In a cool, dark, dry place with good air circulation- they’ll keep for several weeks.

Cook it

Roast (20 minutes); fry (2 minutes). Use in dressings or in soups and stews.

Alternatives

Try spring onion.

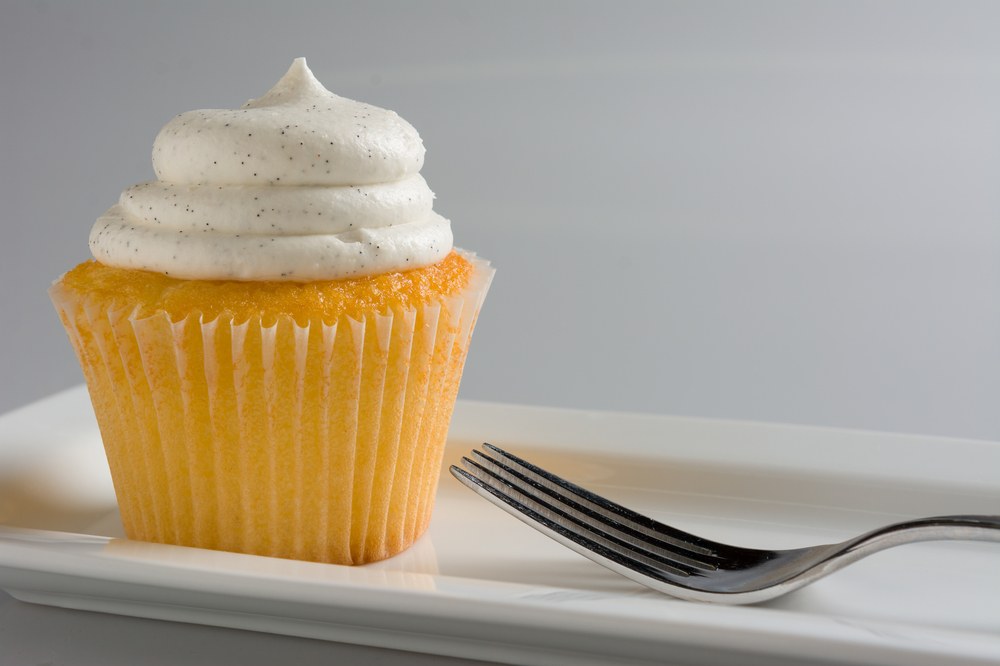
Vanilla Cupcakes

INGREDIENTS

  • 1 1/2 sticks unsalted butter
  • 1 1/2 cups sugar
  • 2 eggs
  • 2 teaspoons pure vanilla extract
  • 2 1/2 teaspoons baking powder
  • 1/4 teaspoon salt
  • 2 1/2 cups flour
  • 1 1/4 cups milk

DIRECTIONS

  1. Turn oven on to 375 degrees F.
  2. Put butter in mixer and beat at medium speed until smooth. Add all the sugar and beat until nicely frosty.
  3. Add 2 eggs without the shell.
  4. Mix well then add: vanilla, baking powder, salt, flour, and milk.
  5. Beat until smooth
  6. Pour into individual baking cups, until they are about 2/3 full.
  7. Bake for 20 minutes or until golden brown.
  8. Makes about 24 cupcakes

Courtesy of : https://www.epicurious.com/recipes/food/views/amy-sedariss-vanilla-cupcakes-236125

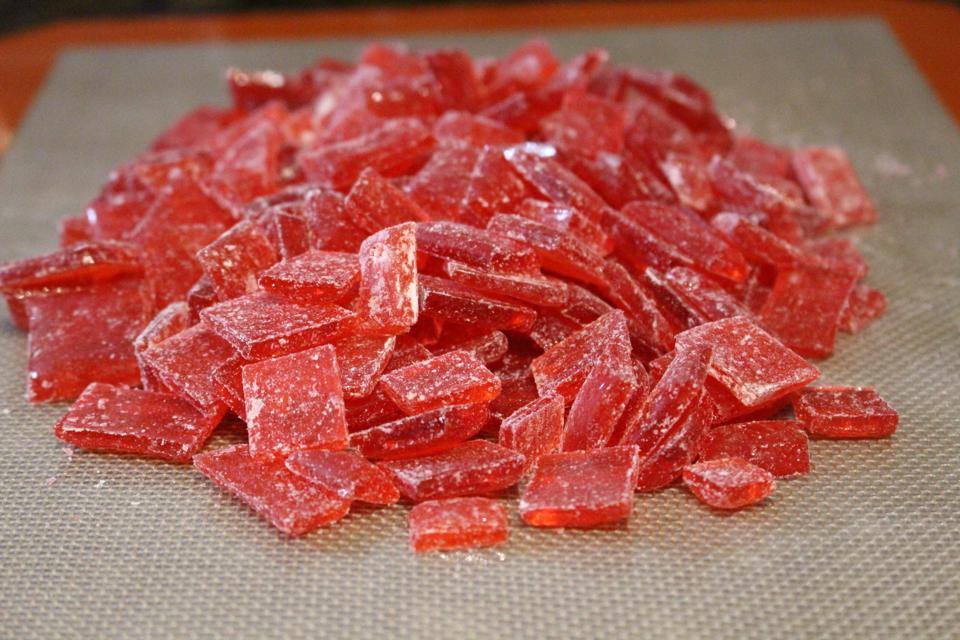
Hard Candy

Ingredients

  • 1/2 cup confectioners’ sugar for dusting
  • 2 cups white sugarC&H Pure Cane Granulated Sugar 4 Lb$1.78 for 1 item – expires in a month
  • 1 cup water
  • 2/3 cup light corn syrup
  • 1 teaspoon peppermint oil, or other flavored oil
  • 1 teaspoon any color food coloring

Directions

  1. Generously coat a cookie sheet with confectioners’ sugar, and set aside.
  2. In a heavy bottomed saucepan, stir together the white sugar, water and corn syrup until sugar has dissolved.
  3. Bring to a boil over medium-high and cook to a temperature of 300 to 310 degrees F (149 to 154 degrees C), or until a small amount of syrup dropped into cold water forms hard, brittle threads.
  4. Remove from heat, and stir in the flavored oil and food coloring.
  5. Immediately pour the sugar mixture onto the prepared cookie sheet in a thin stream (this helps it cool).
  6. When the candy is cool enough for the outer edge to hold its shape, cut into bite size pieces with scissors.
  7. Let cool completely, then store in an airtight container.

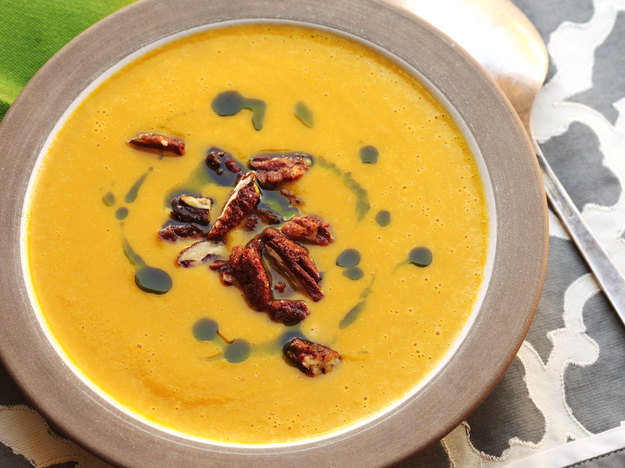
Butternut Squash Soup

Ingredients

  • 4 tablespoons (50g) unsalted butter
  • 1 medium onion, diced (About 6 ounces; 170g)
  • 2 stalks celery, diced (about 4 ounces; 115g)
  • 1 medium carrot, diced (about 4 ounces; 115g)
  • 3 sprigs fresh thyme (optional)
  • Kosher salt and freshly ground black pepper
  • 1 1/2 quarts homemade chicken or vegetable stock, or store-bought low-sodium chicken stock (about 1.5 liters)
  • One (2 1/4 pound; 1kg) butternut squash, peeled, seeded, and cut into rough chunks
  • 2 bay leaves
  • 1/2 cup heavy cream (120ml) (optional)
  • Small squeeze fresh lemon juice
  • 1 to 2 tablespoons brown or white sugar (15 to 30g) (optional)

Directions

  1. 1.Heat butter in a large saucepan or Dutch oven over medium-high heat until melted. Continue cooking, swirling pan constantly, until butter solids are lightly browned and the butter smells nutty, about one minute longer. Immediately add onion, celery, carrot, and whole thyme sprigs (if using), reduce heat to medium, season with salt and pepper, and cook, stirring occasionally, until vegetables are softened but not browned, about 5 minutes. Add stock, squash, and bay leaves. Increase heat to high and bring to a boil. Reduce to a bare simmer and cook until squash is completely tender, about 20 minutes.
  2. 2.Using tongs, discard bay leaves and thyme stems. Add heavy cream. Using an immersion blender or working in batches in a countertop blender, blend soup until completely smooth. Season to taste with salt, pepper, and lemon juice. Add sugar if desired (some squashes are naturally sweeter than others). Serve.

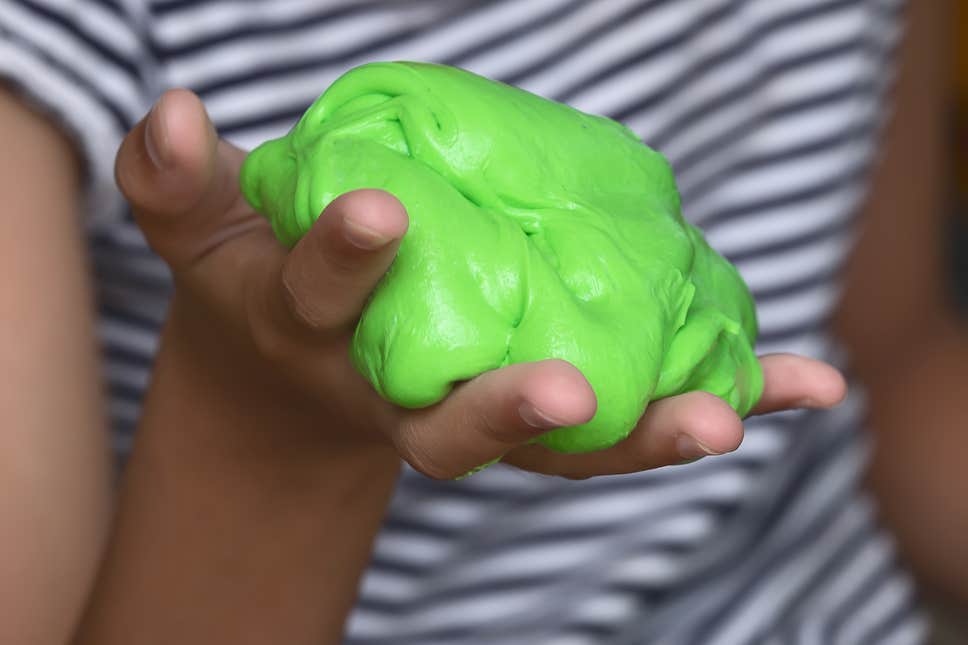
Slime (not for Eating!)

INGREDIENTS

  • 1 Cup Hot Water
  • 0.5 to 3 teaspoons Borax (Activator)
  • 1 Cups White or Clear PVA (polyvinyl-acetate) Glue 
  • 1 Cups Shaving Cream (add more as needed to increase fluffiness)
  • Food Coloring – as Desired
  • 2+ pumps Hand lotion – increases stretchiness

DIRECTIONS

  1. Make Borax mix – activator:
    1. Determine the desired mix from the chart
Desired Result→ More Like SlimeMore like Putty
Borax0.5 Teaspoon3 Teaspoons
Hot Water1 Cup (8 oz)1 Cup (8 oz)
  1. Stir together until borax is fully dissolved. 
  2. In a bowl, add glue, shaving cream and, if used, food coloring to a bowl. Mix thoroughly. 
  3. Add borax mix to bowl SLOWLY (2 teaspoons initially, then 1-3 teaspoons at a time) and mix with spatula. 
    1. If slime is too sticky, add more Borax mix
    2. If your slime “rips” you have too much Borax. Try adding lotion
    3. Knead the slime thoroughly before you add more borax!
  4. Add lotion – 2 pumps at a time. You might need a lot – 10-20 pumps!
  5. When it is the right consistency, add any special additions: glitter, glow powder or pigments. 

NOTES: 

  • Contact lens solution is not needed if you have Borax. If you use saline solution it must contain sodium borate and boric acid
  • Cornstarch is NOT an activator. Liquid starch (which cannot be made at home) is. 
  • Baking soda or cornstarch can be used to thicken the slime. 
  • The borate ions in the slime activators (sodium borate, borax powder, or boric acid) mix with the PVA (polyvinyl acetate) glue and forms this cool stretchy substance. This is called cross-linking! The glue is a polymer and is made up of long, repeating, and identical strands or molecules. These molecules with flow past one another keeping the glue in a liquid state. Until you add the borate ions to the mixture,  and it then starts to connect these long strands together. They begin to tangle and mix until the substance is less like the liquid you started with and thicker and rubbery like slime! Slime is a polymer.
  • Clear glue is less stretchy over time and more prone to breaking.
  • clear glue requires a bit less activator with than with white glue.

The Wonderful World of Shallots

I never realized how versatile and flavorful shallots are until i got a chance to try them recently.

Sliced thinly and pan cooked slowly to draw out the sweetness with caramelization  – a great addition to any dish that call for onions!

Also great on hamburgers, with stir fried veggies, etc!

3 Shallots = 1 onion

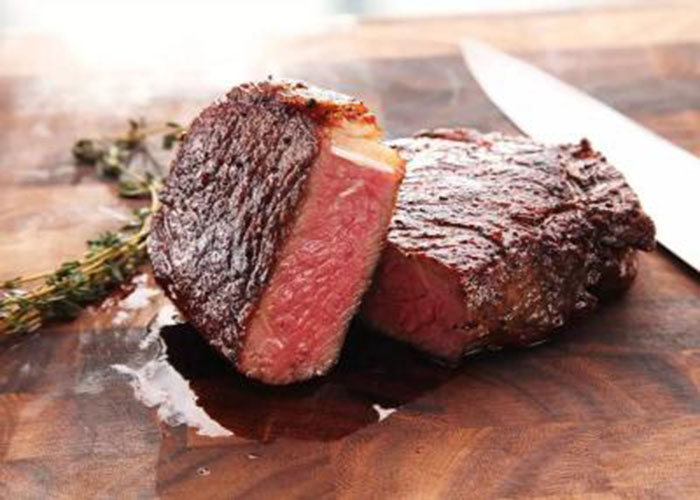
How to Cook a Sous Vide Steak

I learned a lot from this site but most of all i learned how to cook steak

Miguel Ascencios

Ingredients

  • 2 (1 1/2– to 2-inch-thick) ribeye, strip, porterhouse, or T-bone steaks (about 1 pound/450g each), or 4 tenderloin steaks (6 to 8 ounces/170 to 225g each)
  • Kosher salt and freshly ground black pepper
  • 4 sprigs thyme or rosemary (optional)
  • 2 garlic cloves (optional)
  • 2 shallots, thinly sliced (optional)
  • 2 tablespoons (30ml) vegetable, canola, or rice bran oil (if pan-searing)
  • 2 tablespoons (30g) butter (if pan-searing; optional)

Directions

  1. Preheat a sous vide cooker to desired final temperature. (See note for temperature and timing charts, or find the same charts here.) Season steaks generously with salt and pepper. Place in sous vide bags along with herbs, garlic, and shallots (if using) and distribute evenly. Seal bags and place in water bath for desired time according to charts.
  2. To Finish in a Pan: Turn on your vents and open your windows. Remove steak from water bath and bag and carefully pat dry with paper towels. Add vegetable, canola, or rice bran oil to a heavy cast iron or stainless steel skillet, then place over the hottest burner you have and preheat skillet until it starts to smoke.
  3. Gently lay steak in skillet, using your fingers or a set of tongs. If desired, add a tablespoon of butter; for a cleaner-tasting sear, omit the butter at this stage.
  4. After 15 to 30 seconds, flip steak so that the second side comes into contact with the pan. Repeat, flipping steak every 15 to 30 seconds, until it has developed a nice brown sear, about 1 1/2 minutes total. If you did not add butter earlier, add butter to skillet about 30 seconds before steak is done for added richness. Serve steak immediately.

From my friends at serious eats. https://www.seriouseats.com/2015/06/food-lab-complete-guide-to-sous-vide-steak.html

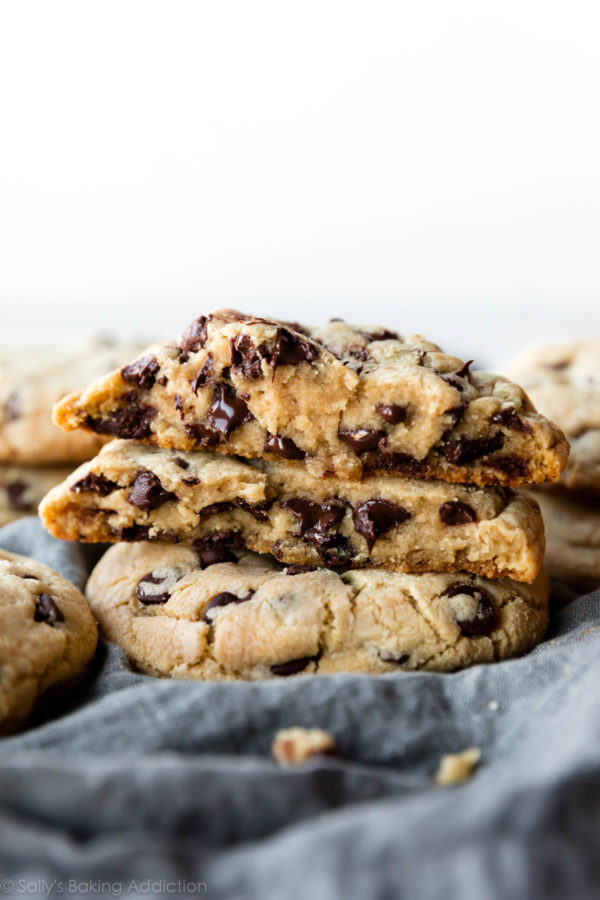
Giant Chocolate Chip Cookies

Ingredients

  1. All-Purpose Flour: 2 and 1/4 cups of flour soaks up enough liquid, allowing us to skip the chilling step completely.
  2. Cornstarch: Cornstarch promises an extra soft and thick chocolate chip cookie. 1 and 1/2 teaspoons of cornstarch is plenty to get the job done.
  3. Baking Soda: For lift!
  4. Salt Vanilla Extract: For flavor!
  5. Softened Butter: This is where the recipes differ. Use softened room temperature butter in these giant chocolate chip cookies, not melted butter. Though we’ll lose a *little* bit of chew, we’re able to skip the cookie dough chilling step. Make sure the room temperature butter is at the correct texture and not melted in the slightest.
  6. Brown Sugar: Did you know that using more brown sugar than white granulated sugar promises a chewier chocolate chip cookie? I swear by it! Additionally, the brown sugar provides that classic chocolate chip cookie flavor and moisture.
  7. Granulated White Sugar: Granulated white sugar does so much more than sweeten the cookies. It melts inside the cookie dough, which helps the cookies spread. Using both granulated white sugar and brown sugar is imperative because without white sugar, the cookies wouldn’t spread at all.
  8. 1 Egg: Adds structure, flavor, and lift.
  9. Extra Egg Yolk: The extra egg yolk adds necessary liquid to the cookie dough, as well as added chewiness and richness. You’ll notice these cookies are extra rich, soft, and dense. Guess what? The extra egg yolk is the magic reason why
  10. Chocolate Chips: Don’t be shy on the chocolate chips! Use 1 and 1/2 heaping cups.

DIRECTIONS

  1. Whisk Dry Ingredients Together
  2. Cream Butter & Sugars Together: Make sure you’re using room temperature butter. The ONLY way this recipe works is if the butter is cool to room temperature, not warm or melted in the slightest.
  3. Add Egg, Egg Yolk, & Vanilla: Beat in the remaining wet ingredients.
  4. Add Dry Ingredients: On a low speed, beat in the dry ingredients and chocolate chips.
  5. Measure heaping 1/2 Cup Portions: Each cookie starts with about 6 ounces of cookie dough, which is a heaping 1/2 cup. But there’s no need for a scale or even a measuring cup– as long as you divide the dough into 6 even portions
  6. Bake: Bake 2-3 cookies on each baking sheet at a relatively lower oven temperature. 325°F ensures the massive cookies cook evenly, instead of over-browning on the edges and tops. The cookies take around 20-25 minutes.
  7. Cool: The giant chocolate chip cookies are extra soft in the centers, so give them 15 minutes to cool and solidify.